
Introduction
There’s a reason experienced home cooks and professional chefs alike treat their woks like prized possessions. A well-seasoned wok isn’t just a cooking vessel — it’s a tool that improves with age, developing a natural non-stick surface, deep flavor character, and a glossy black patina that no amount of money can simply buy off a shelf. But before any of that magic happens, you need to know how to season a wok properly. If you’ve just brought home a brand-new carbon steel or cast iron wok, or if you’re staring at a rusty, sticky, unevenly cooked mess, this guide will walk you through everything you need to know, from the science behind seasoning to the exact step-by-step process, common mistakes, and long-term maintenance.
What Does It Mean to Season a Wok?
Seasoning refers to the process of building up a thin, durable layer of polymerized oil on the surface of a metal wok. When oil is heated to a high temperature on bare metal, it undergoes a chemical transformation — the fats break down and bond to the microscopic pores of the metal surface, creating a smooth, semi-non-stick coating. Over time, with repeated cooking and reseasoning, this layer becomes darker, thicker, and increasingly non-stick, which is why well-used woks in professional Chinese kitchens often have that deep black, almost mirror-like finish.
Understanding how to season a wok correctly from day one sets the foundation for a lifetime of good cooking, since a poorly seasoned wok will rust, stick, and cook unevenly, while a properly seasoned one becomes more valuable — and more enjoyable to cook with — the more you use it.
Why Seasoning Matters
Unseasoned carbon steel or cast iron woks are essentially bare, reactive metal. Without seasoning:
- Food sticks aggressively, especially proteins and eggs
- The metal is prone to rusting, particularly in humid climates or after washing
- Heat distribution can feel uneven or harsh, leading to burnt spots
- The wok lacks the subtle smoky flavor (often called “wok hei”) that seasoned surfaces help develop over time
Once properly seasoned, a wok becomes significantly easier to cook with, requires less oil for stir-frying, resists rust, and develops flavor complexity that stainless steel or non-stick pans simply can’t replicate.
What You’ll Need Before You Start
Before diving into how to season a wok, gather the following:
- A carbon steel or cast iron wok (seasoning does not apply to non-stick or stainless steel woks)
- Dish soap and a stiff scrub brush or steel wool
- A clean kitchen towel or paper towels
- A high smoke-point oil — options include vegetable oil, canola oil, peanut oil, or grapeseed oil
- Tongs or a folded paper towel for applying oil safely
- Your stovetop (gas is ideal, though electric and induction also work with some adjustments)
- Optional: a small amount of green onion, ginger, or cabbage scraps for the traditional Cantonese seasoning method
Step-by-Step: How to Season a Wok
Step 1: Remove the Factory Coating
Most new carbon steel woks are shipped with a thin layer of protective oil or wax applied by the manufacturer to prevent rusting during shipping and storage. This coating must be completely removed before seasoning can begin, because oil layered on top of factory residue won’t bond properly to the metal.
Scrub the entire wok — inside and outside — thoroughly with hot water, dish soap, and a stiff scrub brush or steel wool. This is the one time in the wok’s life where using dish soap and abrasive scrubbing is not only acceptable but necessary. You’ll likely need to scrub harder than expected; the factory coating can be stubborn. Rinse well and dry completely, ideally by placing the wok on a stovetop burner over low heat for a minute or two to evaporate any remaining moisture, since leftover water can cause flash rusting.
Step 2: Heat the Wok Until It Changes Color
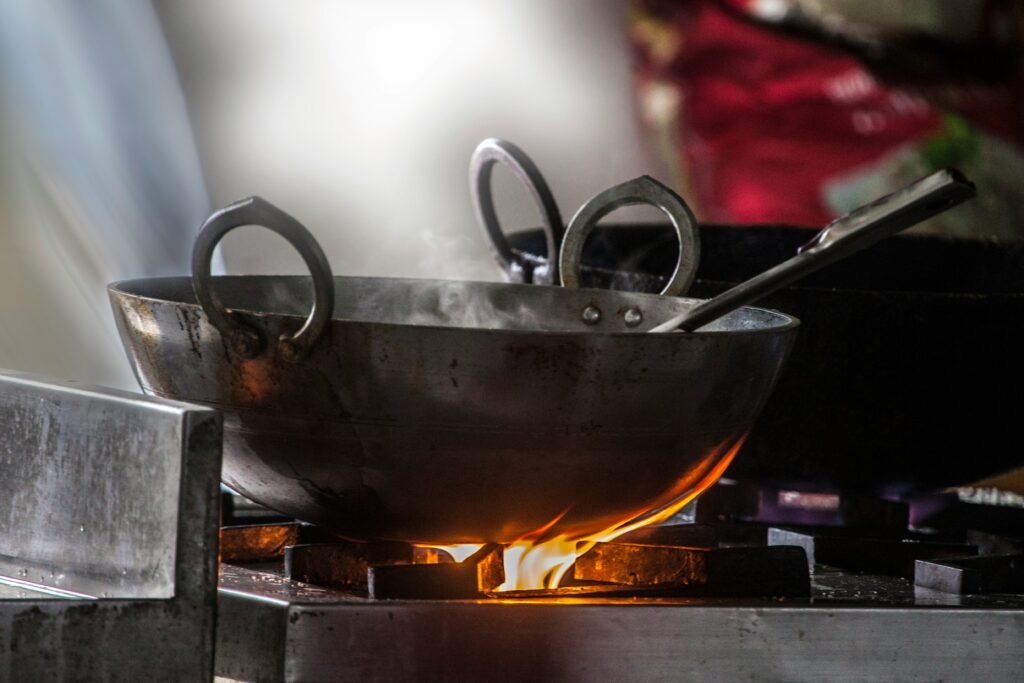
Place the empty, dry wok over high heat. As it heats, you’ll notice the metal begin to change color — often moving through straw yellow, to brown, to blue or purple hues, and eventually toward a darker gray or black tint in spots. This color change indicates the metal’s surface is being altered at a molecular level, which helps oil bond more effectively in the next step.
Rotate and tilt the wok so the heat and color change reach as much of the interior surface as possible, not just the center. This step can take anywhere from 5 to 15 minutes depending on your stove’s heat output.
Step 3: Apply a Thin Layer of Oil
Once the wok has cooled slightly but is still warm, add a small amount of high smoke-point oil — about a tablespoon — and use tongs with a folded paper towel to spread it evenly across the entire interior surface, including up the sides. The goal is a thin, even coating, not a pool of oil sitting at the bottom.
Step 4: Heat Until Smoking, Then Repeat
Return the oiled wok to high heat until the oil begins to lightly smoke. This smoking process is what actually polymerizes the oil onto the metal surface. Let it smoke for a minute or two, swirling the wok to keep the coating even, then remove from heat, let it cool slightly, wipe out any excess oil with a clean paper towel, and repeat the oiling-and-heating process 3 to 5 times.
Each round builds an additional micro-layer of seasoning, gradually darkening the surface. Many experienced cooks recommend doing at least four to six rounds during the initial seasoning process, since a thin, patient build-up produces better results than trying to rush the process with excess oil in one go.
Step 5: The Traditional Vegetable Method (Optional but Recommended)
Many Cantonese chefs use a well-known technique as part of the process of learning how to season a wok properly: stir-frying aromatic vegetable scraps in oil during the seasoning process. After your initial dry-heating and oiling rounds, heat a couple tablespoons of oil and stir-fry a handful of chopped green onions, ginger slices, or cabbage scraps around the wok for several minutes, pressing them against the sides and base.
This step isn’t strictly necessary from a chemistry standpoint, but it helps distribute oil evenly into every crevice of the wok’s surface, adds a layer of flavor-building residue, and is a time-honored technique passed down in professional kitchens. Discard the vegetables afterward — they’re not meant to be eaten, just used as a seasoning tool.
Step 6: Cool, Wipe, and Store
Once you’ve completed your seasoning rounds, let the wok cool naturally. Wipe out any remaining oil residue with a clean paper towel, leaving only a very thin, almost invisible film behind. Store the wok in a dry place, ideally uncovered or loosely covered to allow airflow, since trapping moisture can lead to rust even on a seasoned surface.
Common Mistakes When Seasoning a Wok
Even with clear instructions, beginners often run into a few recurring issues:
- Using too much oil: This leads to a sticky, gummy surface rather than a smooth, hard seasoning layer. Less oil, applied thinly, produces better results than a heavy coating.
- Not fully removing the factory coating: Skipping or rushing Step 1 causes patchy, uneven seasoning that flakes off quickly.
- Skipping the color-change heating stage: Jumping straight to oiling without first heating the bare metal reduces how well the oil bonds.
- Washing with soap afterward: Once seasoned, avoid harsh dish soap, since it can strip the developing oil layer; hot water and a soft brush are usually enough.
- Storing while wet: Even a small amount of trapped moisture can cause rust spots, undoing your seasoning work.
- Giving up too early: A wok typically doesn’t reach full “black and glossy” seasoning after just one session — it develops further with every stir-fry over the following weeks and months.
Maintaining Your Wok’s Seasoning Over Time
Learning how to season a wok is only half the equation — maintaining that seasoning is an ongoing habit that becomes second nature with practice:
- Clean gently after each use: Rinse with hot water and a soft sponge or bamboo brush. Avoid soap unless food is heavily stuck, and even then use it sparingly.
- Dry immediately: Always dry the wok thoroughly after washing, ideally by placing it briefly over low heat, to prevent rust.
- Apply a light oil coat after drying: A very thin wipe of oil after each wash helps protect and build the seasoning layer over time.
- Cook with oil regularly: Stir-frying with oil naturally reinforces and deepens the seasoning with every use.
- Re-season if needed: If rust spots appear or the surface becomes patchy, you can scrub back to bare metal in the affected area and repeat the seasoning process rather than replacing the whole wok.
How Long Does It Take for a Wok to Fully Season?
Unlike a one-time task, seasoning is a gradual, cumulative process. The initial stovetop seasoning session creates a functional base layer, but a wok typically doesn’t reach that deep, glossy black patina until after weeks or months of regular cooking. Some cooks say a wok isn’t “truly” seasoned until it’s been used dozens of times, since every stir-fry, every swirl of oil, and every high-heat sear adds another microscopic layer to the surface. This is part of why many cooks view their wok as a long-term kitchen companion rather than a disposable tool — the more it’s used, the better it performs.
Choosing the Right Wok Material for Easier Seasoning
Not all woks season the same way, and material choice affects both the process and the outcome:
- Carbon steel: The most popular choice for home seasoning, thanks to its relatively thin, responsive surface that seasons quickly and heats evenly.
- Cast iron: Seasons well and holds heat longer, though it’s heavier and can take slightly more effort to build an even coating due to its more porous surface.
- Non-stick or stainless steel woks: These should not be seasoned using this method, as non-stick coatings can’t bond with oil in the same way, and stainless steel doesn’t develop the same porous, oil-absorbing surface.
Conclusion
Knowing how to season a wok is one of the most valuable skills a home cook can learn, transforming a plain sheet of carbon steel or cast iron into a high-performing, naturally non-stick cooking surface that only improves with age. By thoroughly cleaning the factory coating, methodically heating and oiling the surface in thin layers, avoiding common mistakes, and maintaining the seasoning through regular use and gentle care, you’ll end up with a wok that rewards your patience with decades of flavorful, effortless stir-frying. Like many great kitchen tools, a wok’s true value isn’t in how it looks on day one — it’s in the rich, dark patina it earns over years of dedicated use.